Monday, December 19, 2016

Pallet desk

POST 17

THE PALLET DESK part1

It's been a good amount of time since I posted anything but I feel it's time to start back up.
this blog is still going to be just my steampunk builds However I started a new blog that this post is a copy of.
the reason for this is that the new blog is going to be all my carpentry and this one will just be steampunk builds however if something falls under both I will post it to both.
You can check out my new carpentry blog here
AJcarpentry.blogspot.com
Now that's out of the way onto the build.

I first started off with a bunch of pallets Obviously. Then had to take them apart which was kind of a pain what with all the nails in those things. Every single darn nail had to be pulled out. That was a Nightmare.

After that was done I made myself a nice little work bench out of one of the pallets and some 4x4's. (pic on left) 
Then started to lay out the top. I cut a bunch of pieces to 30" as the cross plates to screw the wood to.
I went piece by piece doing my best to pick out the most random pieces as far as size and color to make it have as much of a random look as I could. When I ran out of pieces that were different I started ripping them down and rubbing them in mud to get a different look. I payed absolutely no mind to my screw patterns of if the screw sunk in all the way and on some spots tried to crack the wood. My reasoning for this was the same as before trying to make it look random and carefree. After a few hours of messing around trying to make the wood look like
( Or more so like) garbage wood thrown together I finally finished what was to be the top of the desk. (pic on left) Now onto the rest now the wood the I used for the boarder is store bought however it is the only store bought wood in the finished table. Either way I applied the boarder and lifted it 3/8" above the rest of the table to give room for the poly.


On to the poly!!!
I used a two part pour on epoxy like polyurethane. The smell was tremendous but what was worse is not thinking I never puddled any of the holes in the wood so a lot of it drained right throw the table. That was one expensive learning experience. but the first coat still came out looking pretty good. Problem was it only gave me a 1/16" of coverage crossed the whole  table.


 After a day of drying I used some clear silicone caulk to fill most of the holes and cracks around the table and applied a second coat of poly.
the second coat filled much more of the table up and shined it like a brand new penny. the table was starting to come together just as I wanted it to. And for the look of it it was perfect the poly really brought out the different hues  of the wood much more then anything thing else I did to it.
At this point I was very very happy.


Hope you enjoyed reading and for more pictures and projects you can check out my website 

Also you can check out my Carpentry blog and my terrible Video Game Blog
or my YouTube channel www.youtube.com/AmazingJayman 


Have a great day and thanks for reading.

Friday, May 15, 2015

Lanterns of Tea 99.9% done!!!


          Post #16


          Alright guys this is going to most likely be my last post for these here Tea light lanterns for a while. They are what I would call 99.9% done (Hence the title of this post) Now the reason I will not say they are done is because the LED's do not give off nearly as much light as I would have liked so I am going to get new LED's in the future and replace them but this most likely won't happen for at least a few weeks.

           Until then THE LANTERNS ARE!!!! Done? Yes as done as they are going to be at least till the new lights.


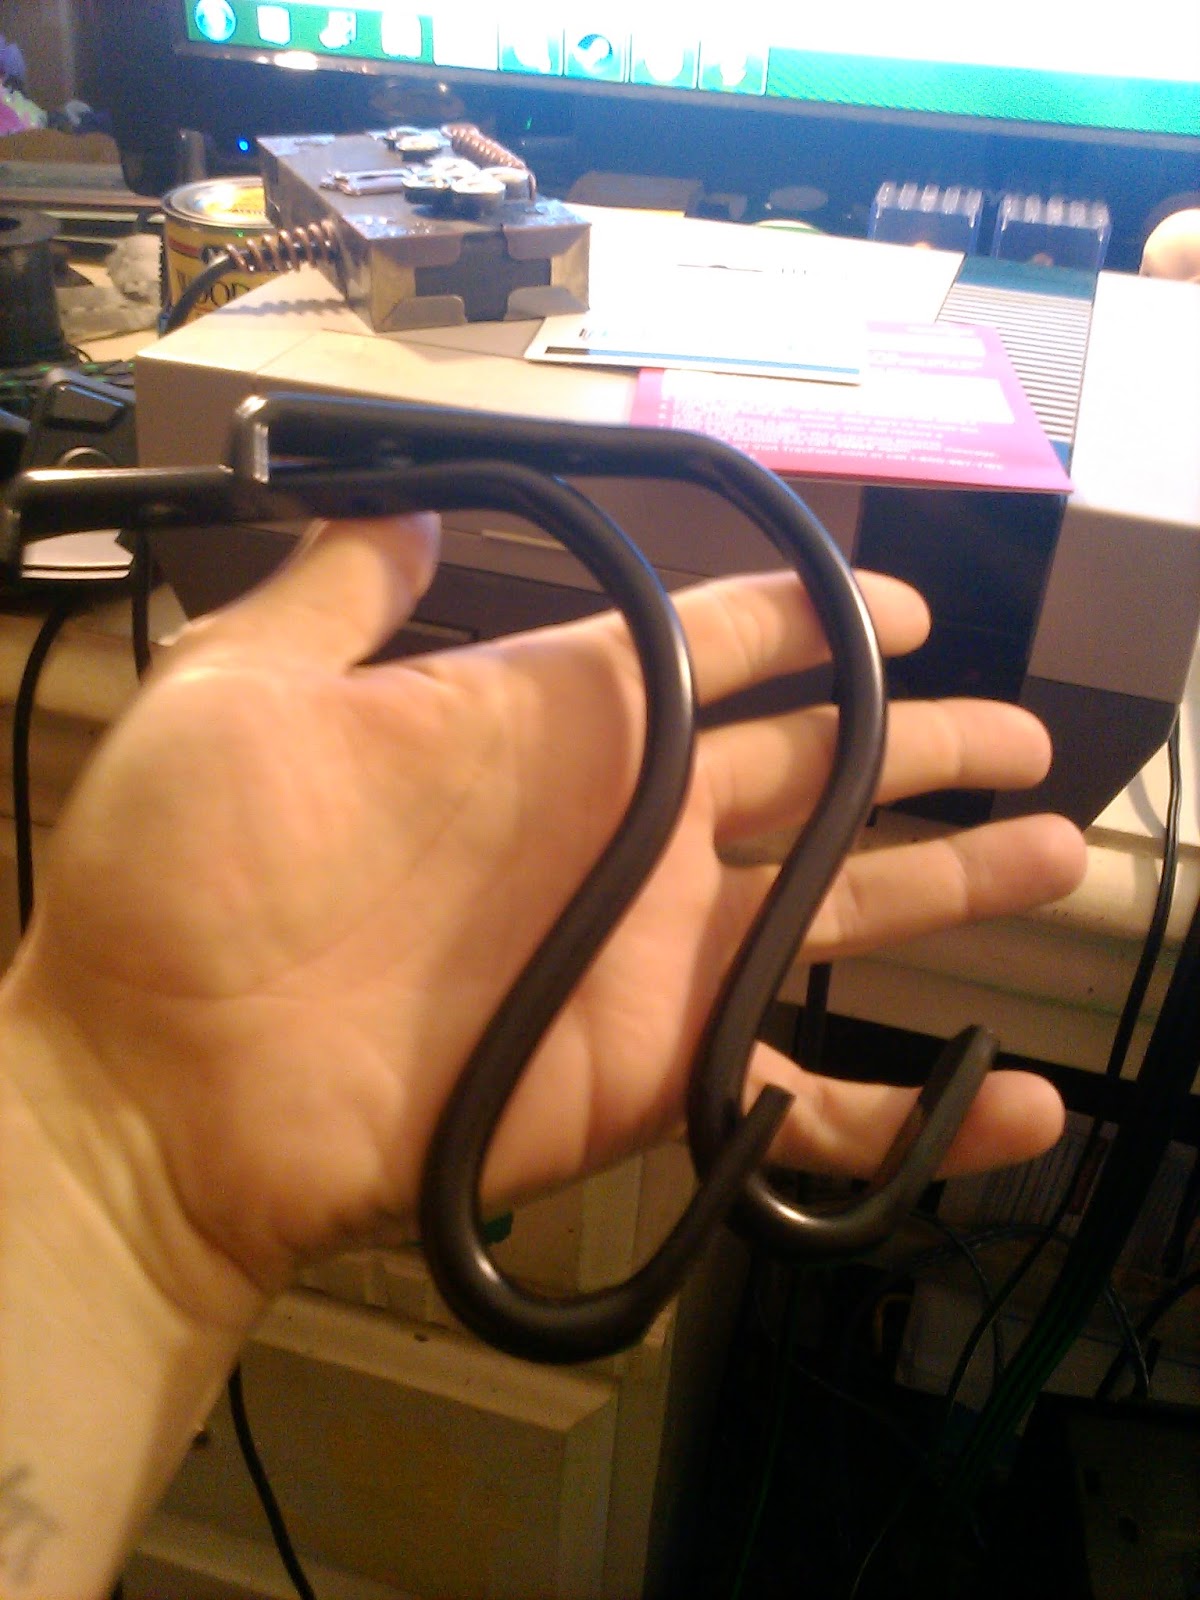
        To finish these bad boys off I found these metal plant hangers at walmart for dirt cheap. (Picture to left) I bought them and brought them home and started "Antique-ing" them. (Picture to right)
Again going over them with some Rub N' Buff, and some choice paints. And got them looking pretty good. I think the black base coat that was on them from the store really brought out the color of said antique-ing a lot more. These things look great!!! I very very pleased with how they turned out.


      Then I looked around the room and tried to figure out where I was going to hang these things where 1. they are not going to get in the way. 2. they don't look out of place and pointless. And 3. where I could easily hid the wires in or behind something.  My computer monitor was my best choice and to be completely honest I'm very glad I made that choice. These things look great hanging off my computer! However it did make me realize that new I need to make my monitor match some how in some way. Hmmm........ I wonder how I could do that? So stay tuned for my to rip that 27" TV apart and start fooling around with that too!! XD


        Here is a nice shot of both the Lanterns hanging off either side of my computer monitor I really thing they look amazing. I truly am very happy with how these turned out.


This is a picture of how the Lanterns look at night. I know it's really hard to see and doesn't look like much of anything which is why I made the picture small because I am only uploading it to show they do turn on. However this is the only part of the lanterns I am disappointed in. The red LED's like I said before just are not as bright as I thought they would be and they really do not have the effect I was looking for. But hey live and learn right? Again like I said I plan on getting color changing LED stripes that work off a remote and revisiting these so to swap the LED's out.


       So that about it for this post Thank you for ready and if you like my builds please feel free to give it a like, A nice comment, And follow for my future builds. I have a great one in the works right now. Also again I will leave this with a video of the build and I'll see you guys later. Thanks for ready.


Wednesday, May 13, 2015

Lanterns of Tea continued!!!


        Post # 15


        Hello Ye Ol' Interwebs and welcome to post number 15 of my blog.

        So back in November of 2013 I started a new build and made a posted about it in my blog post Lighting The Lanterns of Tea! My tenth post on my "Steampunk Journey" blog. now this build never got very far nor has it been work on at all really since that post. In my last housing move I noticed the top to one of the lanterns sticking out of a box of random nick nacks. I pulled both of them out and rewired the lights seeing how they have somehow been pulled apart. With my newly found "I don't need a workshop to build things" attitude I began to fool around with them again.


        Where we left off with said Lanterns of Tea was not very much of anything done. The glass on the sides has been removed. With four holes one in each corner drilled through the bottom to allow for the red LED's to be installed and shine up into where the tea light candles would normally sit. and that is close to about the time I just stopped because No matter how much I tried no matter how many stores I went to I could not for the life of me find Rub N' Buff. With that being said the lanterns were put on the back burner.

       After a year and a half of being pushed aside and finally finding a store that sells Rub N' Buff The Lanterns of tea will finally get the love they deserve. I started by applying a coat of Rub N' Buff to the lanterns to give them a nice brassy look. In the picture to the left you can see the left lantern has a nice brass finish to it while the right still is completely silver. Looking back on it I think I should have put a brown base coat of paint first to give it more of an antique look but I like the way they cam out. I think they still have a nice shine and color to them.


         I continued working on them by taking this very thin plank of pine that I found a A.C. Moore and cutting out little trapezoid shaped pieces to fit the top holes of the lanterns. Put a nice coat of Minwax Jacobean stain on them to give them that dark old look and installed them.


      I then took the glass pieces that had originally been removed from the lanterns and used them to size up the cuts to be made in the metal mesh I found. Now this metal is an awful lot like the punched metal that would be found on your grandmas old pie cupboard door. I really loved the look of it so I bought it a while back and had it just sitting around for the right project. Thankfully it didn't get ruined or lost before I continued this project.
       
After cutting out metal mesh into pieces that would fit into the glass slots of the lanterns I installed them into the lanterns as you can see the big difference that mesh makes. I think it really gives it a pretty unique look.


Wish the Lanterns painted all brassy and nice, Wood pieces, And metal mesh installed. I was yet again at a stand still. I plan on wiring them up so that all the wires are hidden inside and out the top because I would really like to hang them. Also I need to figure out where to hang them and I also think I might put a few more LED's inside the top pointing down.
      As you can see from this picture of the lights off and the red LED's inside the lanterns on (even though this picture makes it look even worse) Though the LED's light up the lanterns it doesn't really have that creepy red glow effect I was looking for. I was really looking for an almost demonic red glow out of these so that I could put them on at night and have a really nice looking accent light in the living room. 


       Alright so that's about it for my Tea Light lanterns for now. Still not a completed project I know but hey they are a lot closer to being done than they were a year and a half ago. So....... points!?

       At any rate thats you for reading and hang around these lantern will hopefully be down within the coming weeks with some nice hangers fully wired up, maybe some more LED's. Don't know yet. If you enjoy the blog or any of my builds please give it a like through a few comments out there on them and press that follow button it will give me more motivation to keep it up. Thanks again and stay steamy!! That was dumb sorry.


Thursday, May 7, 2015

NESteampunk Anyone?


             #14


          HELLO.... THERE..... INTERWEBS!!!!!

          So it has been a long time since my last post. Over a year! Well to say the least things in the past year have been Very hard for me. Very long story that I'm sure most people will not care about so I'll keep that to a minimum. Long story short I still have yet to find a new place for my workshop and the divorce is still hindering my living situation.

         With that out of the way I stopped at A.C. Moore yesterday and pick up a few things to fool around with some small builds. I found some things to finish my Tea lights from a few posts back, and I started and finish this last build.

       
        So to start off this build I took one of my NES controllers. I purposely chose the one that was slightly discolored because no one likes discolored NES controllers. No one! At any rate, I First tried seeing if I could clean it up because I never tried to make anything with just a faux antique paint job. So I was going to try my hand at it. But cleaning it up didn't work out as planned and I quickly realized My painting skills are not up to par to pull that off.


        I then decided that this will be another wooden build so I ripped the controller apart to see what my plan of action was going to be doing that. Even though I probably should not have expected anything different I was still surprised at how few components in this controller there are. So after ripping it all apart I quickly realized that the way the buttons are held in place would be impossible to recreate out of wood so the only way to do this is just reskin the controller with very thin wood.


I then glued the contact rubbers to the circuit board as if the case was holding them in place. Followed by Gluing the original buttons to the rubber contractors. Then glued some wooden spacers to the buttons knowing I would need them to extend the buttons past the new layer of wood soon to be on top of the controller casing.


        After putting the case back together and building the new wooden exterior case cover if you will. I added some extensions to the select and start buttons. The I said "Ok now I have a wooden NES controller." "How am I going to make this more steampunk?"


Gears!!! so I put two little gears on it one for the start and one for the select button. Then See how I have all these Typewriter key charms I bought from the craft store I thought. Perfect!! the A and B buttons. Then put a nice coat of minwax Jacobean stain on said controller.


         After that I just went crazy with the Brassy bits. I added U,D,L,R typewriter keys for the up, down,left,and right, D-pad. Some sheet copper corner covers I made that are almost impossible to see in the below picture. Four stamped corner plates, A Key hole plate and some copper wire twisted over the cord end and a little on the bottom for a little more metal-ness.


              So there it is boys and girls my Steampunk NES controller. It has been over a year since I have built anything and I was really happy to get something new done. Also Like I said earlier in the post I plan on finishing the tea light lanterns soon so stay tuned for that update. thank you for reading and I will also link my youtube video of this build for anyone who wants to check it out.


Thursday, February 27, 2014

Stairs!!!!


       Post # 13


        So as I said I would have a post of a custom staircase. The pictures are kind of self explanatory so this probably won't be a very long blog post.

     These first two pictures were taken after the construction had already started and was half way done.

      At the back side of the stairs the was a wall that had an outside corner and a lally column in the corner.  So we had taken out the walls, lally column and the main beam. The main beam was replaced with three 2"x16"x16' Microlams to open the room up more.      


      As you can see the stairs made no sense at all. When you walk down them you were facing the wall and not walking into the room. (Stupid design for a finish basement)


     So now the stairs Are facing the right way and look much much better. Everything on the staircase with the exception of the rails and spindles is 100% hand made.

     I wish I had more time to have been able to make the rails by hand as well but time is money and this job went on for way too long. As soon as we opened up the walls and ceiling it was a nightmare of wires and pipes and just all around hacked together crap. So best thing to do is if you don't know how to do something right don't do it. Because its people like me who have to fix it one day.


      Well thats about it for the staircase post like I said short and sweet. And not very steampunk-ish at all but still a fun project I felt like sharing. The lamp build will be coming soon. In the process of finding a new job to pay for it so might take a bit.

      Again thanks for reading and to all the continued Readers thanks for coming back to read more. Please feel free to follow my blog and give it a like It will give me more motivation to keep going, keep building, and keep blogging.


Friday, January 31, 2014

This is 12


  Title says it Post 12


      Yes sir yes sir post number 12. This post is not going to be a whole build, Nor will it be a half of a build. More of just the start of the build.

       So as I said in my last post I will be building up my small project to completion just to get some post up and waste time really till I can get a new workshop up and running. Also like I said the first build to be completed is going to be the lamp. Now I have quite a few good Ideas and are being put in motion right now, However this will turn into quite the pricey endeavor.

        I recently remodeled my parents basement and had to move a substantial amount of plumbing pipes. After the job was done I was left with a good amount of leftover copper pipe stock. The first thing my mind turns to is of course my lamp. After it was all said and done I was left with A few three to four foot lengths of 3/4" pipe, One of 1", And one seven foot length of 1/2". (left picture)
 Also I had a whole mess load of 3/4" pipes that had to be cut out to be relocated and eliminated. Naturally all the pieces that were not being use were also going to go straight to the lamp project. (right picture)


          So as of right now I am in the process of cut and fitting and figuring out just how I'm going to put this whole thing together. so like I said before this is not a build post but more of an update.

          More to come soon I promise. Thanks for reading. thanks to the people who keep reading and I will have a nice new lamp build post soon. PS. Off the Steampunk topic ( I know blasphemy right?) I will have some nice custom staircase pictures to show off and a bar top build. (hopefully a full bar build to show as well)

Monday, January 27, 2014

Copper Lamp Anyone?


         Long over due post #11


         Hello to all ye who are reading my blog. (which I'm sure is very few)
Well to start this post I should point out that I haven't been building or posting at all for the past few months because of some personal things going on. Needless to say they have changed everything about my life, and housing arrangements have been hindering my ability to build anything. (no workshop = no build)

       However I did manage to grab my Lamp shades on my last visit to ye ol' workshop. (my old basement)
I plan on finishing this project first. Starting today I have been working on this project and will be uploading new pictures and new post about it.

      After that I also have the tea lights project to finish, And once again will be doing so and posting soon. To all the people who read my blog. Sorry for not keeping up with it, And I will start the new postings very shortly. In due time I do plan on finding a new place to set my workshop back up and finish all of my projects and of course start some new ones.